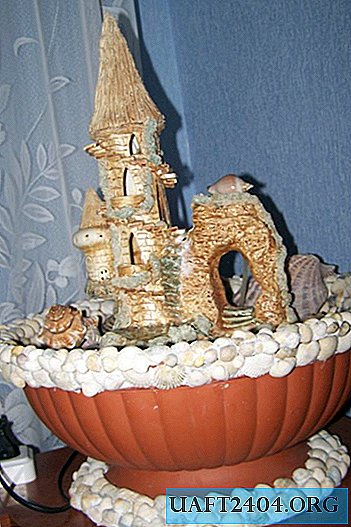
So, how to make a desktop decorative fountain?
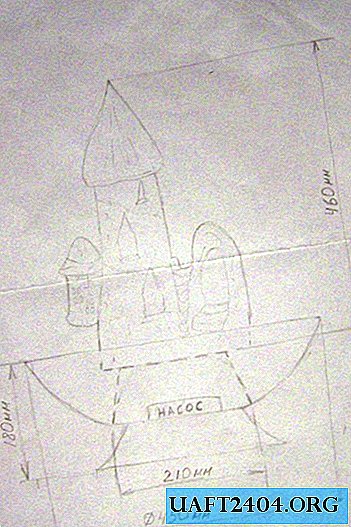
First you need to decide on the place of its installation and the dimensions of the finished product, draw a sketch on which the main parts and their sizes will be displayed.
Visit a number of hardware and electronics stores where you will need to buy many different products, such as a decorative plastic container, shells, two tubes of white (only white) liquid nails, one tube of transparent silicone (preferably for showers), a porcelain or clay lock (with steps or grooves along which water will flow), a special small-capacity pump and decorative stones.
The first step is to try on the main components. After successfully adhering to the dimensions during the fitting process, we proceed to assembly and gluing. Rinse both containers well and degrease the parts on which the shells will be attached. Gluing seashells is slow, moving around the entire circle from top to bottom, starting from the top edge of the decorative container. It is necessary to completely fill the entire cavity of the shell with liquid nails, and only then attach to the wall surface. To stick the inner walls of the container with shells, you need to use silicone. The scheme of sticking shells you see in the photo.

After the glue has dried, it is time to install the pump, a small container, and a lock. A small container should have 3-4 holes on the sides for the passage of water and laying the supply wire, as well as an opening for discreetly attaching a flexible transparent tube through which the water flow will rise. The pump is located at the very bottom of the decorative container. The lock is attached tightly with silicone to a small container. The result of the work performed is shown in the photo.


We continue to paste over shells and small pebbles with the surface of a small container and other visible parts. Do not waste time and silicone on sticking places whose visibility will be covered by large stones. Do not forget to mask and stick the transparent tube through which water will flow. After completing all work using silicone and glue, allow the product to dry for 24 hours. After the glue has completely dried, it is time to place all the stones and other elements of the jewelry. Water should be poured filtered or distilled to prevent the formation of white layers of salt on the stones. After completing all the preparatory work, turn on the pump and rejoice at the appearance of a new original interior element in your home.


