Share
Pin
Tweet
Send
Share
Send
You can proceed and take the following for this:
• Chocolate scheme;
• Blue cardboard under A4 leather;
• Scrapbook paper in blue-blue tone with daisies, sheet 30 * 30 cm;
• Picture with a hare and flowers;
• Felled circle of light pink color;
• Printed inscriptions with wishes;
• White and blue gardenia flowers, hydrangeas and fabric lilies;
• Polymer jewelry roses and a key of white and blue colors;
• Light blue polka dot polka dot ribbon;
• Satin blue polka dot ribbon;
• Frame made of polymer clay light blue;
• Sugar stamens and berries green, blue and beige;
• Ink blue;
• Stamp flower;
• Curb flower punch;
• Cabochons and half-beads white-blue;
• Wide blue ribbon with white and pink butterflies;
• PVA glue;
• Ruler, scissors and pencil;
• Double-sided tape;
• Lighter;
• Sewing machine.

The diagram shows a chocolate bar in expanded form. When folded, we will have a size of 9 * 17 cm, respectively, with reserves for pockets exactly in a horizontal position, one sheet is enough.


Cut out the base from blue cardboard. It has bending lines, we draw them under the ruler with scissors. The remaining strips are cut down with a curb punch. From the blue satin ribbon we cut two pieces of 15 cm each.


Fold the box and glue one strip from the bottom and the second from the top.


From the scrapbook paper, cut out three rectangles 8.5 * 16.5 cm. Round off all the pictures, cut them out by ribbon.


Glue PVA and double-sided tape to glue pictures, ribbons and strips, as in the photo.


Sew on a typewriter all pictures and inscriptions. Now all three rectangles are glued to the base and also each in turn is sewn.


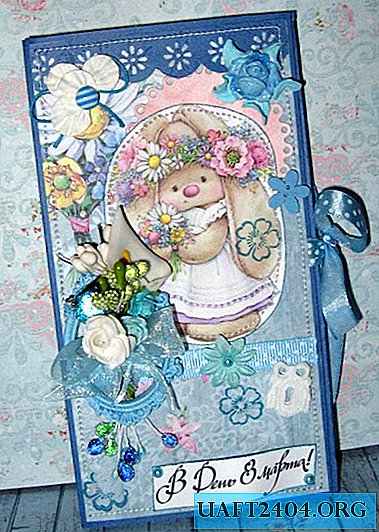
Glue the pocket of the chocolate. Now we tie the bows, make a bouquet and glue the decor on the card, as in the photo.


This turned out to be such an interesting chocolate card for congratulations on March 8. Thank you for your attention and good luck!


Share
Pin
Tweet
Send
Share
Send