Share
Pin
Tweet
Send
Share
Send
What do you need for work?
- Flexible thin branches (they can remain after autumn cleaning and cutting bushes in the garden)
- Thread in the color of a tree (not very thick, sewing thread will do)
- Thick thread (light color or white)
- Satin ribbon
- lit or matches for firing the tape
- bumps
- A small sheet of cardboard
- pencil
- scissors
- needle

Well, let's get started! The first step is to create a framework - a ring of woven branches. First, take larger branches and form a circle from them, firmly fixed with a thread. Do not worry if the circle looks more like an uneven ellipse - in the future this will not be noticeable and in the end it will turn out to be a circle.

Next, add new branches, clinging to the thread and branches that are the basis.

We twist the ring with each branch, approximately as shown in the diagram.

Gradually adding more and more new branches, we get a voluminous ring.

This interweaving gives the ring an intricate and unusual look.

Now we will braid the ring from the branches with a thick thread, making a loop, for which it can be hung from the door or to any object in the house as a holiday decoration.

Next, we take the tape, after singing one of its ends, and begin to wrap it around the ring.

At the top, in the place where the loop is, we tie a bow.

The next step is to cut out paper angels that will add a wreath to the winter mood.
We draw an angel silhouette on a sheet of cardboard (you can find and print the finished one), fold the sheet in half and cut it out. Thus, we get two silhouettes of Christmas angels.

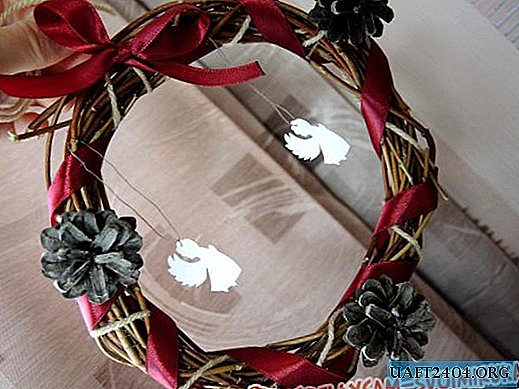
We make a hole with a thin needle in the silhouette and thread the thread, for which we attach the angels to the wreath.

Immediately you can tie the thread to the cones.

Now we combine all this together and get a charming Christmas wreath.3.jpg
Needlework you success!
Share
Pin
Tweet
Send
Share
Send